After having a group discussion and showing each other our animation file we created we each decided to make adjustments. I did some tweaking with the camera making the camera lens much smaller therefore allowing the camera to see more. This helped me knock some frames off of the frame count and made the camera look more zoomed out.
After tweaking the cameras for each of my animation files, I then moved on to adding some of the missing items. I first added the toilet signs to the doors which are found at the top of the stairs. I then added a few pictures around the guildhall, two in the library and one at the top of the stairs.
I also created a whiteboard which has been overlooked as an objected needed to be created for the guildhall. This was done by simply creating an editable poly box and using the inset tool to create a border around the front polygon. Next using the extrude tool to move the polygon back to show off the border. I then added a white material to it.
I then added a few lights around the guildhall. These are photometric lights and with Michaels help was able to create a few lights and place them around the guildhall, kitchen and library.
All of the windows were then rotated so that the detail in the window could be seen more clearly. I also added a few materials to the guildhall including a wooden material to each of the doors and wall paint to each of the rooms. All these are pre-set materials found within 3ds max. I then added the beams to the main guildhall, one running down the length of the room and another a bit lower across the width of the room. I added a smaller beam joining these two beams together.
I then added the projector into the room placing it in front of the whiteboard. This projector will be hanging from the lower support beam. A small cylinder is then placed between the projector and the beam to make it look as though the projector is hanging from the beam.
small chair
I decided to create a quick and simple chair, like the ones often found in a classroom. This chair will be placed inside where the services stairs should be found outside the kitchen. This is because this area is quite bare at the moment; it’s just an empty room between the guildhall and the kitchen.
A simple chair can be created by first creating an editable poly box and splitting it into segments. Next extruding out two rows of segments either side of the box and deletes the faces within them to create a hole. Patch up the gaps in the faces using the shift copy method to drag lines over the unwanted gaps. Extrude a row of segments out at the top of the box to form the back of the chair and move the vertices back a little. Apply a mesh smooth to make the chair look a little more rounded.
This chair can now be placed in the room next to the kitchen and copied a few times to look like multiple chairs.
Re-animate the last animation
Because of all the changes and things added to the guildhall the last scene needs to be re-animated so as to make sure that everything stays in the same place. These can be imported but the number of changes that have been made will make it much easier to re-do the last part. This scene just involves the camera moving back into the guildhall from the kitchen and then moving to face the whiteboard.
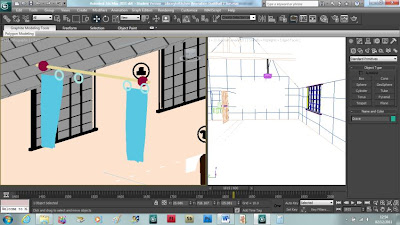
I also imported some curtains that we will use to end the animation, with the curtains closing in front of the camera. These curtains were made by me last year and they were done using the reactor method.


No comments:
Post a Comment